
The new kayak is different, but good. I like the openness of the Redfish12 cockpit, but the storage options on the Trident are much better. The OK Trident is definitely faster. But harder to turn. There are pros and cons about every kayak. I'll leave it at that for now.
As far as rigging a kayak goes, I think it's a very personal thing. There are some people who are minimalists and do very little to their kayaks and there are some people who can't wait to drill another hole in their plastic. For me going from one style of kayak to a very different style took some getting used to. Over the years, I created a system of storing things in my Redfish and I didn't even have to look behind me to know where certain things were going to be. You may have different preferences so take this as just my two cents. I think some of the things I'm about to go over will evolve in time, too. But for now this is what I did.

I also put two flush mount Scotty bases back next to the crate. I can put my VisiCarbon light pole in one if I don't want to take a space up in my rod holder. And of course, I can put a Scotty rod holder in one, too (ie: flyrod holder). In addition to that, if I want to film something I can put my camera-mount-on-a-pole in the rod holder as well. I made sure to put plenty of Goop around the drilled holes before I riveted these Scotty flush mount bases in. Also, make sure to get the flush mounts that are sealed at the bottom so it's not a big hole for water to get in.


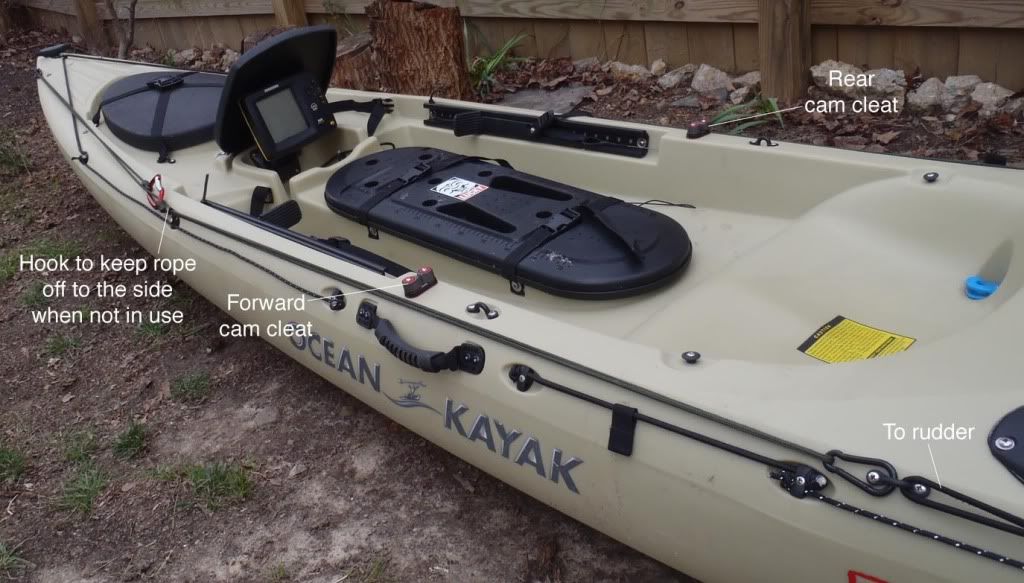
Next came the anchor trolley. With tips from someone very familiar with Ocean Kayaks, this installation was fairly simple. I put my deck loops close to the ends of the kayak and found small stainless steel carabiners to take the place of a pulley. Since I have a rudder I split the anchor trolley system in to two parts; front anchoring on my port side and rear anchoring on my starboard side. I made sure to put the end points in a place to make it easy to slide the rope back and forth and not have to reach too far forward or back. I also put little hooks to keep the rope out of the way when not in use. I installed cam cleats to hold the anchor rope. I had clam cleats on my other yak, but sometimes the rope would slip out. I was told by a reliable source that cam cleats were the way to go. They held the rope well, but also easy to take out too.

 I forgot to mention this before, but the new 2011 Tridents come with a replaceable keel guard.
Pretty sweet.
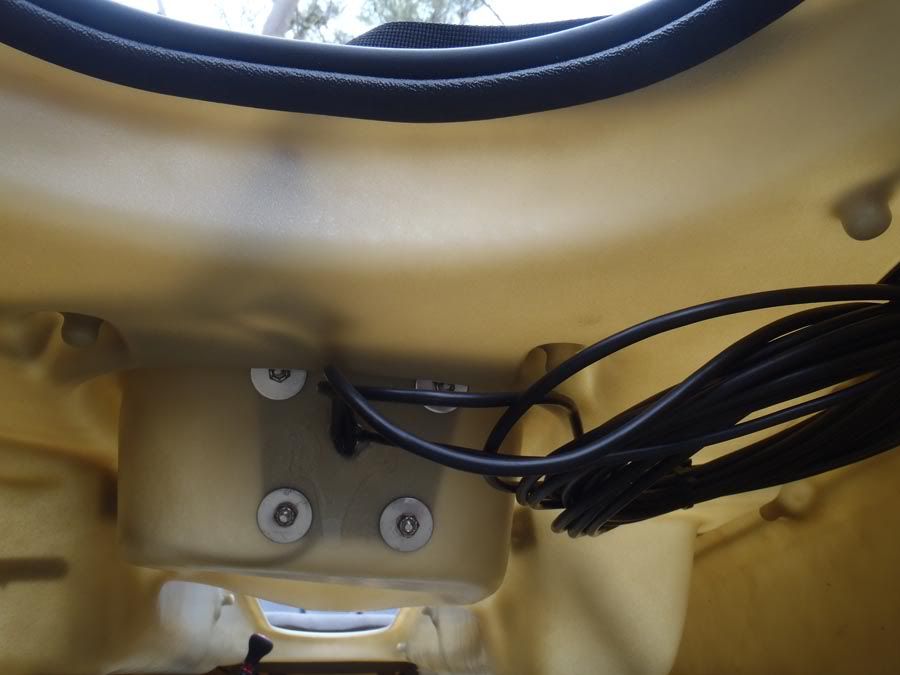
Next I worked on a depth finder. I want to mention that depth finders are obviously not essential, especially if you already know the area well. But I do like them for exploring new areas and sometimes checking water temps. I didn't get a really fancy one with dual sonar, gps, color this and that. Don't get me wrong, those are all great things to have and I'm sure they will come in handy. But I just wanted one that would tell me where the drop offs are. Simple and not too pricey. Since the sonar shield on the Trident 13 is a little past the foot wells, I also wanted one that I can still read well. After much deliberation, I went with the Humminbird 560. Like I said, nothing fancy, but still big enough to read from a distance. It came with the normal transducer that most people will mount to the inside of their hull, but I wanted to take advantage of the Trident's transducer compatible scupper feature. So I called up Humminbird and they gave me a return number, asked me to ship them the transducer that came with the unit and in return they would send me the right one for free. So I paid for shipping, sent it off, and 8 days later I got the new Plastic Thru Hull Transducer. I passed it though the scupper, bolted it down, drilled a hole on the back wall of the sonar space just big enough to send the wires through, and installed the unit.

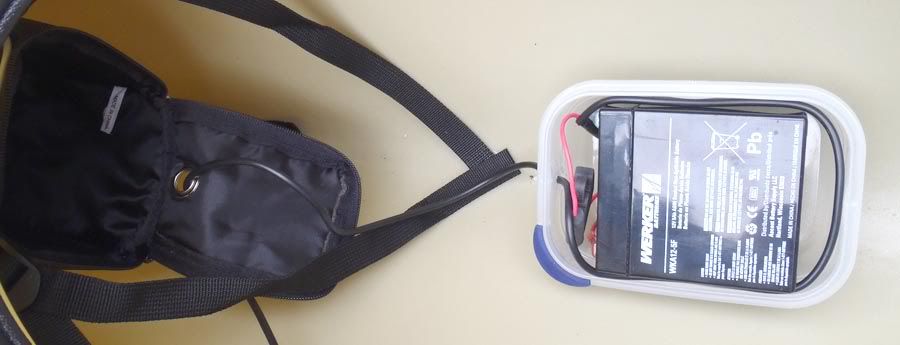
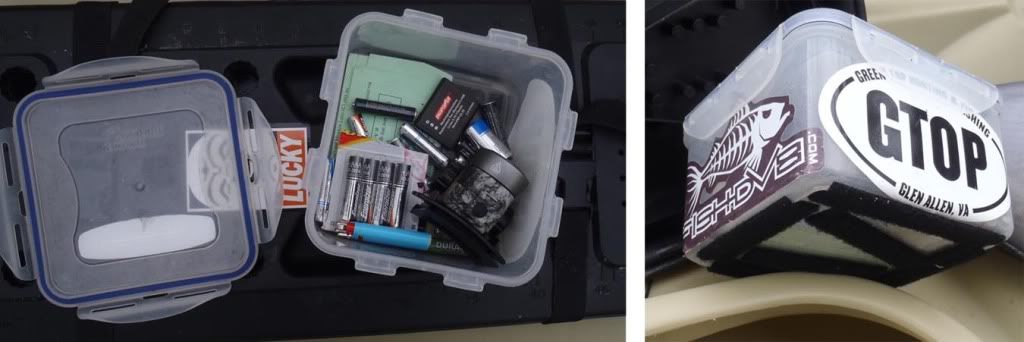
Next I went looking for a battery box. While browsing through Walmart I came across the food storage section and found Sterilite air tight/water tight containers that would fit my battery just right. Only thing is, it was only available in a big set with a bunch of other sizes. But I figured for $19.97 (compared to $30 for one OtterBox) I could use the other ones for Gulp! containers. Anyone who has had a leaky Gulp container knows, the words stinky and foul just don't cut it; especially in the heat of summer, in a small hatch back like I drive. Barf. Also, the containers work great for dry storage (ie: extra batteries, wallet, keys, phone, etc.). And for me it was time to replace the old containers in the kitchen that I got with sandwich meat. Anyway, I digress, back to the battery box... I drilled a hole, passed the wire, sealed it with Goop, wired a fuse, hooked up the female wire attachments, put the top on, slid it in the Trident's suspending battery bag and shizam, there you have it.

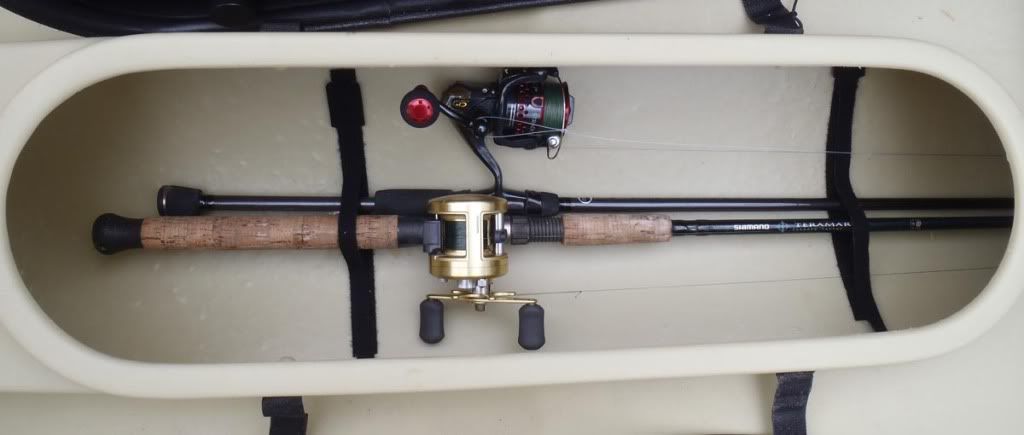
I also put strips of adhesive backed velcro in the rod pod
so I can keep my rods in place and not tumbling around.
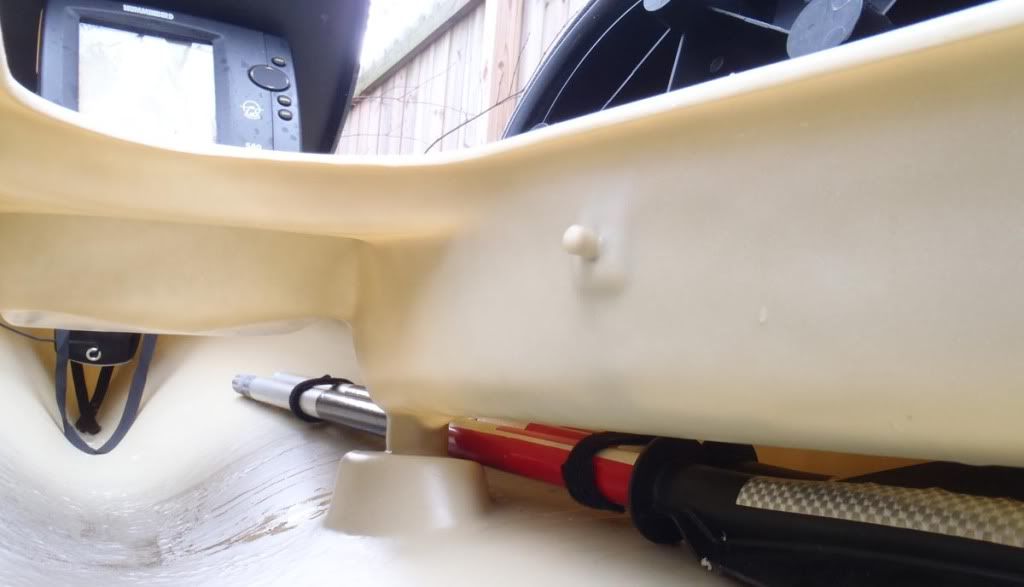
I used velcro strips to keep my extra paddle together and wedged it in between the side hull and the scupper hole.
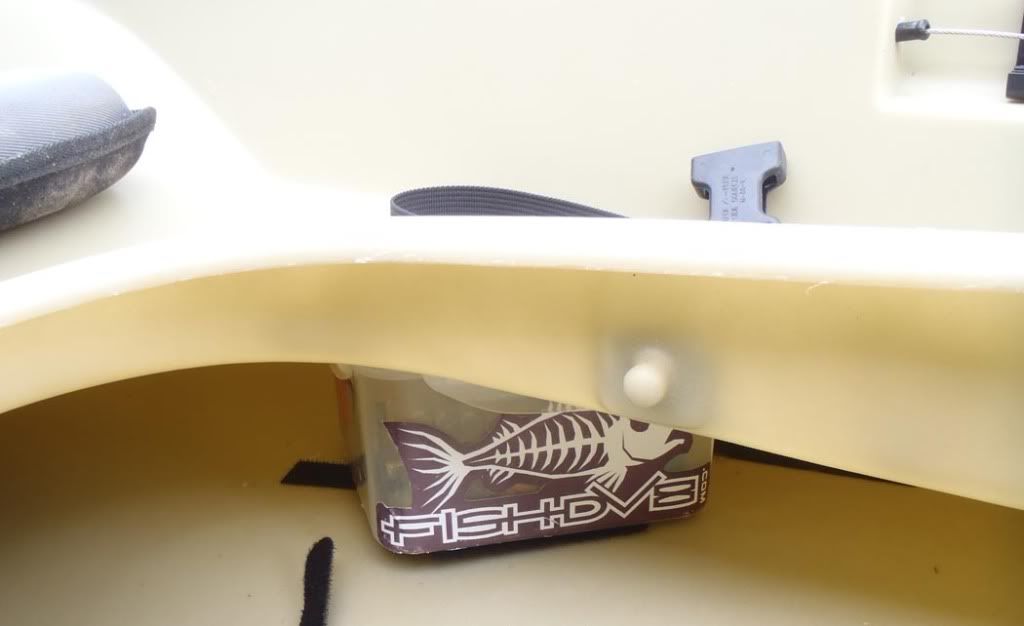
And finally I used adhesive backed vecro to keep my dry box in place off to the side, in the hull,
not taking up top side space.
Nice set up man!!
ReplyDeleteReally well thought out.
ReplyDeletequestion: when looking for a fishfinder for my kayak...do I need to look for one with a certain type of transducer?
If you have a have an Ocean Kayak that has the transducer compatible scupper feature you can go with the one I was talking about in this post. Otherwise, the one that comes with the unit should work fine, but you have to install it inside the hull. It won't have an accurate temp reading but it will still shoot through the hull and give you the depth.
ReplyDeleteThat may have been a long post, but packed with lots of good info. I was jealous before, but now I'm nearly foaming at the mouth.
ReplyDeleteI'm sure you'll have a blast with it.
Thanks guys. I had a good time putting it all together, but I plan on having a better time putting it to use. Ash, you wanna come down for a tog trip soon?
ReplyDeleteGreat post! I don't have an OK but I can definitely apply much of this to my kayak. Thanks for sharing!
ReplyDeleteI bought the 15' last year and am still in need of some rigging. How do you like your flag there? I was thinking about putting mine right behind my seat and clipping camera to that perhaps? I thought it may get in the way back there? Have you fished much out the back with your flag there? I still need to mount my fishfinder. I like your use of velcro...it's so simple.
ReplyDeleteThanks InChun! My pleasure.
ReplyDeleteBenjamin, I put my flag there sometimes and sometimes I put it in the crate rod holder. I used to have my camera mounted on a flag/light pole, but I decided to switch it up and make a separate camer pole. I don't think I ever fish out of the back unless I'm trolling, and then the flag is in the back crate rodholder.
Rob, I have the humminbird 385ci installed on my T13 and found that when its in the down position the black cover doesn't sit all the way. Are you having the same issue with your FF since your using a larger unit than I am?
ReplyDeleteYeah, mine cover sits up a tiny bit, but it doesn't really bother me.
ReplyDeleteThis comment has been removed by the author.
ReplyDeletenice! what kind of bag is that you have around your crate, or is that not a crate?
ReplyDeleteHi Nick. It's made by Precision Pak... here.
ReplyDeletehttp://www.precision-pak.com/fishing.php?start=24&prod=Cratepak%20Tackle%20Management%20Outfit
Rob:
ReplyDeleteWhere did you find the big aluminum carabiner?
Hi Charlies. I got mine from REI. Blue Ridge Mountain Sports have them as well. Most specialty climbing shops should carry them.
DeleteGreat. Thanks for the info Rob!
DeleteHow do you find the through hull transducer? Do you think it's worth switching the regular transducer for?
ReplyDeleteI like it. I didn't have to do anything to the inside of my kayak to make it work. Most people have to use some sort of marine goop or lexel along with some foam to make their transducer shoot through their hull. With the new Humminbird the water temp reading will be accurate and the install will be much easier.
DeleteRob,
ReplyDeleteWhat did you mean when you say you, "wired a fuse" when putting the battery in the water tight box? Is that a modification you made for safety or is that standard procedure that comes with the equipment?
It's something that comes with the Humminbird. The instructions in the box are easy to follow and simple to do. :)
DeleteThis comment has been removed by the author.
ReplyDeleteGreat post! I have been slowly rigging a Trident 13 for a little over a month. Thanks for putting this together for people (like me) who are new to the sport. Do you know of any videos or more detailed instructions on installing the anchor trolley? I like the way your setup sounds but I'm having trouble visualizing how every goes together.
ReplyDeleteMy anchor trolley is basically two pad eyes, rope and a carabiner. One pad eye on each end and pass the rope through. Make it tight with the carabiner where the rope joins. Hope that helps. Let me know if you have any other questions.
Delete